A great tasting cup of coffee is the way most of us like to start our morning. There are many ways of brewing at home, or on your travels, but one of our favourite coffee toys for brewing while traveling would have to be the AeroPress way! It produces a superb cup of coffee every time and is so fast! This guide will teach you how to brew Aeropress coffee to perfection.
You can make from 1 – 4 cups of coffee per pressing, with each pressing only taking around 1 minute.
HERE’S OUR EASY STEP-BY-STEP INSTRUCTIONS TO BREWING A PERFECT AEROPRESS:
1. Make sure your AeroPress is clean and completely dry before using, otherwise the plunger tip may not be able to form a perfect seal inside the chamber.
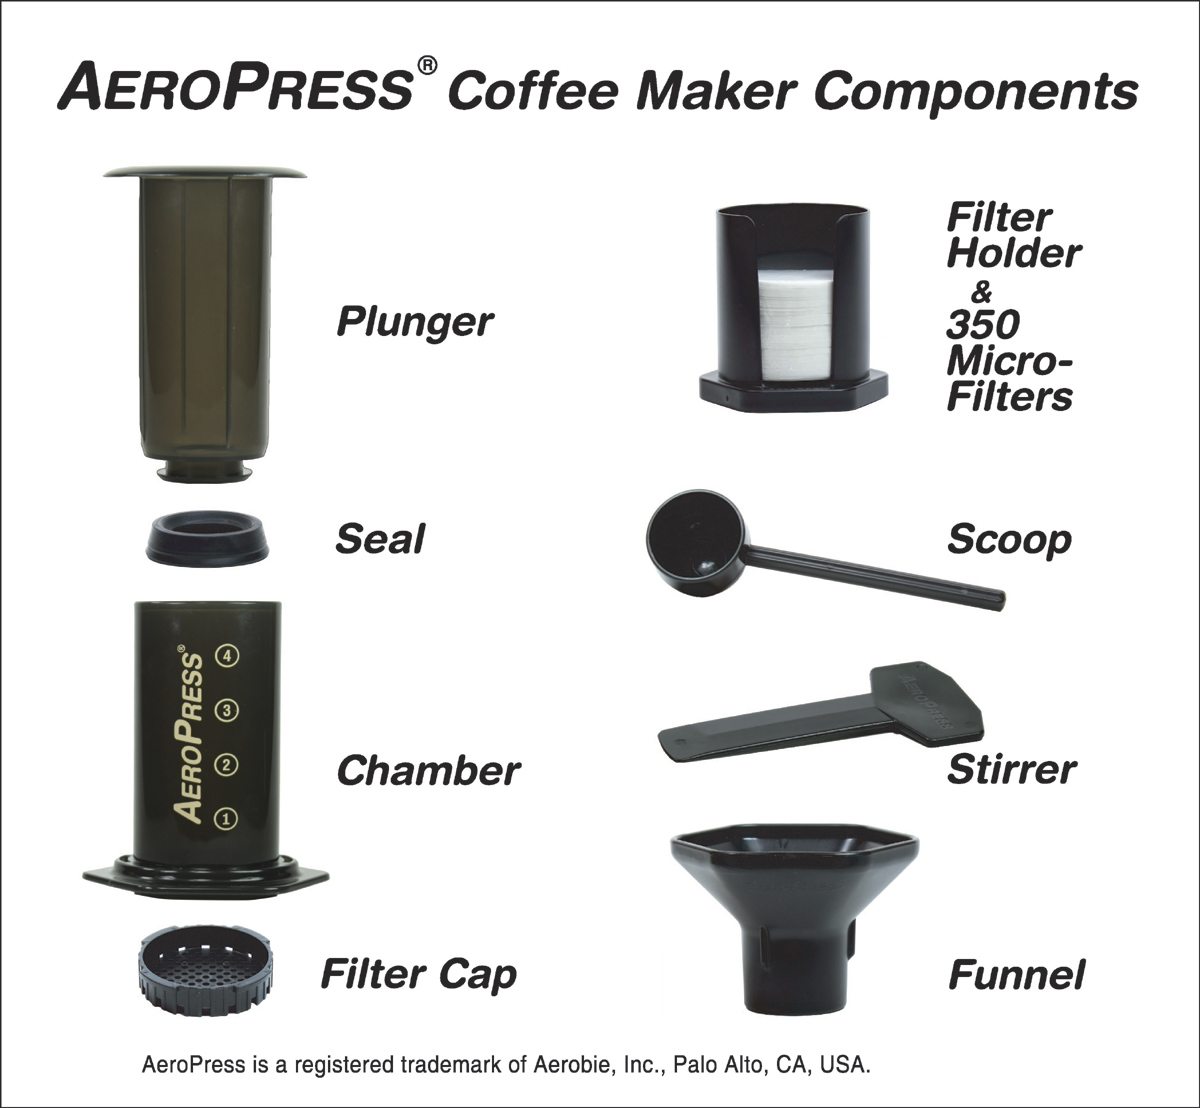
2. Remove the plunger and cap from the chamber.
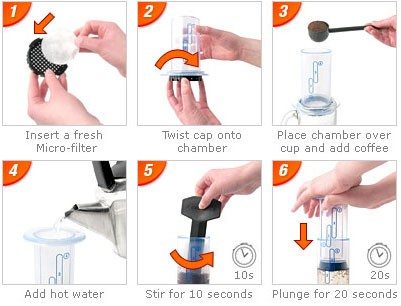
3. Put a micro-filter inside the cap and twist the cap onto the chamber.
4. Put the ground coffee into the chamber: 1 scoop for each espresso (up to a maximum of 4 scoops). A funnel is provided for use with a coffee grinder. Use the scoop to measure the beans into the chamber.
Water Temperature: Everyone we tested, from coffee lovers to professional coffee tasters, preferred coffee brewed with the water temperature between 80° to 90°. Lower temperature makes a smoother brew so we recommend that you do not use boiling water.
5. Dribble the water slowly into the chamber for the first few seconds to wet the grounds. Then fill to the desired level. Never fill higher than number 4. The plunger can be used to measure water. Just fill to the appropriate number (you can also use the plunger to heat water in a microwave).
6. Stir the water and coffee together with the paddle for about 10 seconds.
7. Wet the rubber seal and insert the plunger into the chamber. Press the plunger. After the plunger has moved a short distance, you can feel the air pushing back at you. Continue pressing gently to maintain pressure and the air will push the brew through the grounds. The plunger will sink slowly and reach the grounds in about 20 seconds for a double, slightly less for a single or slightly more for a triple or quadruple. Then let the coffee drip for a few seconds. Invert the AeroPress as you lift it off the cup. Pressing slowly is the key to a rich brew and an easy push. If it feels too stiff, just press more gently.
8. Sit back, relax and enjoy!
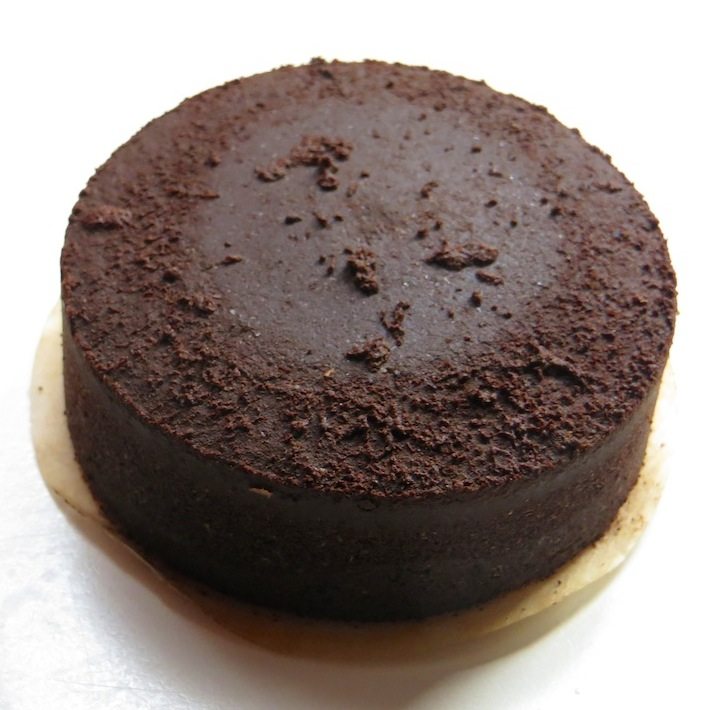
9. CLEANING UP: Remove the cap, hold the AeroPress over the bin and press the plunger to eject the ‘puck’ of spent grounds.
10. Leave the plunger pushed fully in and rinse the rubber seal. Brush or wipe it to remove the coffee oils. AeroPress IS NOT dishwasher safe. Always store the AeroPress with the plunger pushed all the way in, or completely removed, to avoid compressing the seal.
RE-USING MICRO-FILTERS:
2000 filters use about as much paper as one city newspaper, so you don’t need to feel guilty about discarding filters. You can however re-use each filter many times just by brushing it off under running water. The choice is entirely up to you. When re-using a filter, remove the plunger and twist the cap containing the wet filter onto the chamber. This will keep it flat as it dries and you’ll be ready for the next pressing. There is a year’s supply of micro-filters with your AeroPress so you are set for a long time.
Alternatively, you can purchase a stainless steel filter for a lifetime of AeroPress happiness!
STEEPING TIME:
If you’ve used a plunger in the past, you may be tempted to let the mix steep for several minutes before pressing. Long steeping, however, only adds bitterness and acidity and is not necessary.
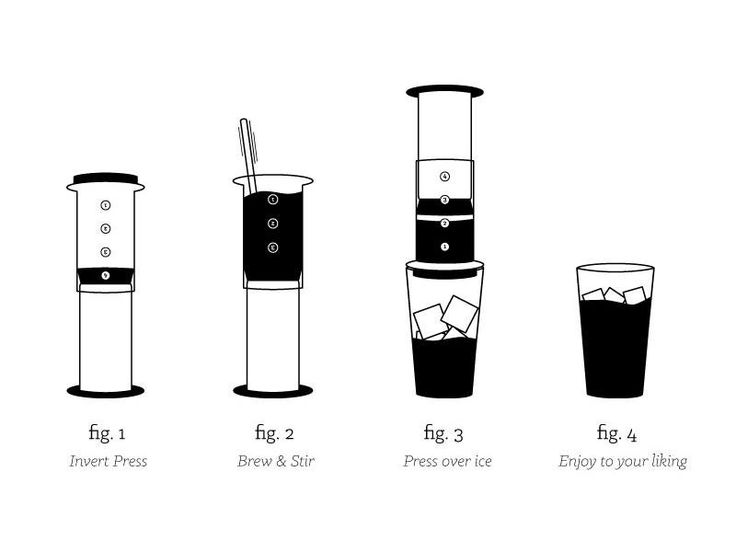
ALTERNATE WAY OF BREWING AN AEROPRESS:
During those hot Summer months, we often feel like a cold coffee to avoid the heat. How about trying this inverted method of brewing an iced coffee with an AeroPress? DELICIOUS!!